Windows 11 Pro setup

First time for me doing the out-of-box experience with Windows 11 Pro preloaded on new hardware.

ThinkPad X13 2-in-1 Gen 5 is a very nice laptop. Completing initial power-on and setup, since it was Windows Pro, I opted for a local admin account and associated it with a Microsoft account.

Once on the desktop I installed KeePassXC, Calibre, AeroAdmin, Firefox, iTunes, and Kdenlive. I used Kdenlive to create a few videos describing settings or usage for some of the apps. YouTube links sprinkled through this post.

The person getting the laptop has decided to step up their online credential game. Rather than using variations of a base password they want to learn to use and manage more complex ones. Bravo, I say. And check out the videos I made about using KeePassXC to do that, Login with KeePassXC and KeePassXC, Updating a Password.

Calibre is an e-book library manager. I included it because it has become very useful to me and I encourage everyone to try it. All those household documents, appliance manuals, car owner manuals, serial numbers and VINs can be cataloged and available at your fingertips. It’s also a great way to organize training guides, magazine and web articles, etc. Maybe my calibre library info system review will pique your interest.

Sometimes the hardest part of giving remote support is getting the recipient to recognize the steps that need to be taken to complete the connection. This AeroAdmin guide is my attempt to clarify that.

Then Firefox was added because after some updates Edge would no longer login to some Microsoft websites. That prevented access to some account info, among other things. So, install Firefox and with it successfully login to every Microsoft site that Edge would not login to. Firefox is there because a backup to Edge is necessary.

And what resolved Edge’s problems with Microsoft’s own sites? Disabling all Edge security features for any Microsoft.com, Office.com, Live.com domain. And after all that “Device encryption” couldn’t be enabled because it didn’t recognize the Microsoft account was logged in. It clearly was as demonstrated by access to OneDrive, Microsoft365, and other integrated features after logon to the desktop with no more credential prompts for any of those services.

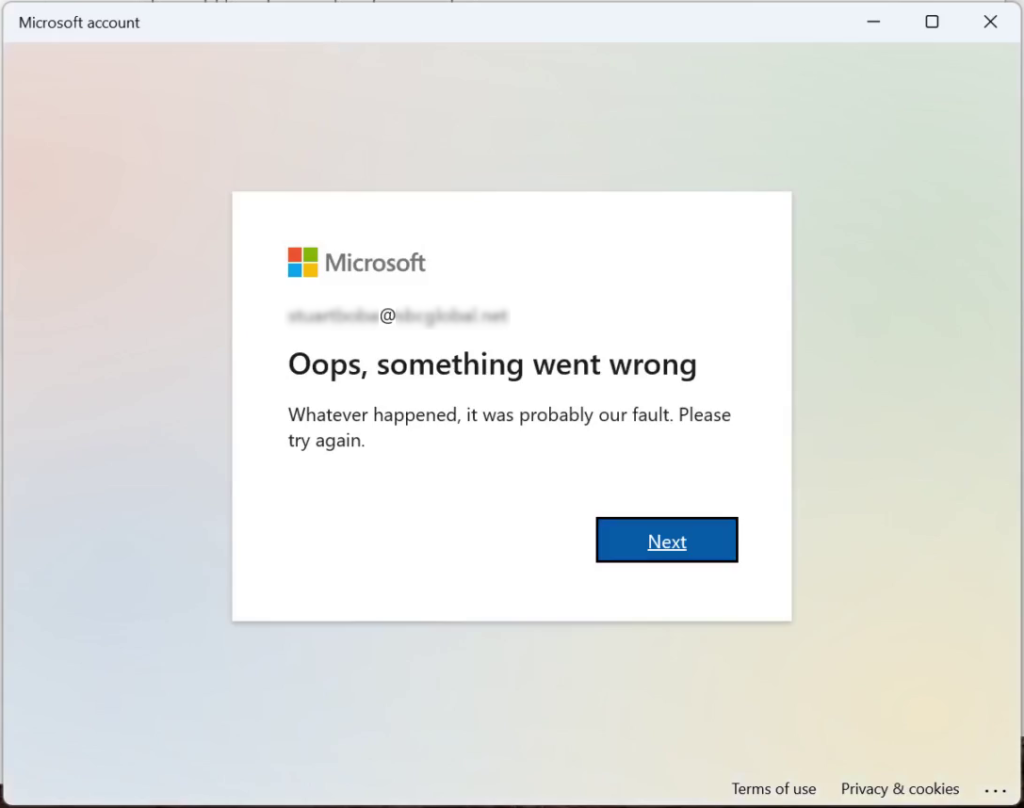
It seems Microsoft tries to soften the blow when enabling device encryption fails with their messages, “Oops something when wrong” and “it was probably us”. It sets a light mood and is a relief at first. But after having the problem for more than a week it is disturbing that nothing has changed.

That didn’t get resolved before the laptop was delivered to its owner.

Powershell – install a program with no .MSI

Don’t let the quoting drive you mad!

In an earlier post, Powershell – love it / hate it, I described needing to check the install status of a program that didn’t have an .MSI installer. That post provided details of parsing the install file names to know which pcs got the target install. This post provides details on what I did to make the install happen and create the files that logged the process.

With no software deployment tool and only an .exe for install you can still keep track of deployment with powershell.

In this case the program needed to be targeted at specific computers, not particular users. Easy enough to create a list of target pcs. Without an .MSI file GPO install isn’t available unless… that GPO runs a startup script to do the install. But it can’t be a powershell script if that’s disabled in the environment, so .bat files it is. Still want to know which pcs get the install and which don’t so have to log that somewhere.

How to make it all happen? This is how…

An install .bat file that makes use of powershell Invoke-Command -ScripBlock {} which will run even if powershell is disabled. The quoting to run the commands within -ScriptBlock {} gets really convoluted. Avoided that by calling .bat files from the -ScripBlock {} to have simpler quoting in the called .bat files.

The prog_install.bat file checks if the runtime dependency is installed and calls the .bat file to install it if it isn’t. Then it checks if the target program is installed and installs it if it isn’t found. For each of the steps the result is appended to a log file based on the hostname.

REM prog_install.bat
GOTO EoREM

REM prog name install
REM
REM This routine checks that both Windows Desktop Runtime (a dependency) 
REM and prog name are installed and writes the status to a file to have  
REM install results history.
REM 
REM The install results file must be in a share writeable by the process
REM running this install routine which is after boot and before logon.
REM 
REM A file is created or appended to based on the hostname the process
REM runs on. 
REM

:EoREM
 
@echo off

REM Check if required Microsoft Windows Desktop Runtime is intalled. 
REM Install if not found. 
REM Write reslut to results file.
Powershell Invoke-Command -ScriptBlock { if ^( Get-ItemProperty HKLM:\\Software\\Microsoft\\Windows\\CurrentVersion\\Uninstall\\* ^| Where-Object { $_.DisplayName -like """Microsoft Windows Desktop Runtime - 3.*""" } ^) { Add-Content -Path \\server\prog\prog_$Env:COMPUTERNAME.txt -Value """$(Get-Date) $Env:COMPUTERNAME Microsoft Windows Desktop Runtime is installed.""" } else { Start-Process -Wait -NoNewWindow \\server.local\SysVol\server.local\scripts\prog\inst_run.bat; Add-Content -Path \\server\prog\prog_$Env:COMPUTERNAME.txt -Value """$(Get-Date) $Env:COMPUTERNAME Microsoft Windows Desktop Runtime NOT installed. Installing""" } }

REM Check if prog name is intalled. 
REM Install if not found.
REM Write reslut to results file.
REM NOTE: Add-Content before Start-Process (reverse order compared to runtime install above)
REM       Above Add-Content after Start-Process so "installing" not written until after actual install.
REM       For prog name install, if Add-Content after Start-Process then Add-Content fails to write to file.
REM
Powershell Invoke-Command -ScriptBlock { if ^( Get-ItemProperty HKLM:\\Software\\Microsoft\\Windows\\CurrentVersion\\Uninstall\\* ^| Where-Object { $_.DisplayName -like """prog name""" } ^) { Add-Content -Path \\server\prog\prog_$Env:COMPUTERNAME.txt -Value """$(Get-Date) $Env:COMPUTERNAME ver $($(Get-ItemProperty HKLM:\\Software\\Microsoft\\Windows\\CurrentVersion\\Uninstall\\* | Where-Object { $_.DisplayName -like """prog name""" }).DisplayVersion) prog name is installed.""" } else { Add-Content -Path \\server\prog\prog_$Env:COMPUTERNAME.txt -Value """$(Get-Date) $Env:COMPUTERNAME prog name NOT installed. Installing"""; Start-Process -Wait -NoNewWindow \\server.local\SysVol\server.local\scripts\prog\inst_prog.bat } }

The batch files that do the actual installs refer to the SysVol folder for the programs to run. Using the SysVol folder because need a share that’s accessible early in the boot.

REM inst_run.bat
REM To work prog requires the following Windows runtime package be installed

start /wait \\server.local\SysVol\server.local\scripts\prog\dotnet-sdk-3.1.415-win-x64.exe /quiet /norestart

REM inst_prog.bat
REM Install the prog name package.

start /wait \\server.local\SysVol\server.local\scripts\prog\prog_installer_0.8.5.1.exe /SILENT /NOICONS /Key="secret_key"


So there you have it. To install a program with its .exe installer via GPO in an environment with no .MSI packager, no deployment tool, and powershell.exe disabled by GPO use powershell Invoke-Command -ScripBlock {} in a .bat file to do the install and log results. And call .bat files to simplify quoting where needed.

Get-WinEvent, read carefully to filter by date

Get-WinEvent hashtable date filtering is different.

Widows event logs have lots of useful information. Getting it can be a slow process. Microsoft even says so in a number of posts and recommends using a hashtable to speed up filtering.

Many powershell Get-… commands include a method to limit the objects collected. A -Filter, -Include, or -Exclude parameter may be available to do this. They are generally implemented along the lines of <Get-command> -Filter/-Include/-Exclude 'Noun <comparison_operator> <value>'. Objects with <DateTime> type attributes like files, directories, users, services, and many more can all be filtered relative to some fixed <DateTime> value like yesterday, noon three days ago, etc. As a result the answer to the question, show every user who has logged in since yesterday afternoon, can be known.

In the case of the Get-WinEvent cmdlet none of these parameters are available. However the cmdlet’s output can be piped to a Where-Object and the event’s TimeCreated can be filtered relative to another time. In that way filtering is similar to how it works for other cmdlets that include a -Filter parameter.

All that goes to say I’d become very complacent about how to filter <DateTime> in powershell.

Now I needed to filter events in the log and, as claimed in many Microsoft posts, log filtering can be slooow. The posts also say filtering speed can be increased significantly by using a hashtable for filtering. And wouldn’t you know it, Get-WinEvent has a -FilterHashtable parameter. Great! Let’s use that to speed up my slow log filtering.

Well, guess what? Unlike any other <DateTime> filtering I’ve done there is no way to filter for StartTime or EndTime being greater than or less than some other time. And the fact that the hashtable key names StartTime and EndTime were being used instead of TimeCreated should have been my first clue that I wasn’t doing the usual filtering on TimeCreated.

The only option in a hashtable is to assign some value to a key name. So how to filter for, say, events that happened yesterday? There is no one <DateTime> value that represents all of yesterday. <DateTime> isn’t a range or array of values it is a fixed point in time value.

And for me this is where things get strange with Get-WinEvent. It can be used to extract events from a log, and those events can be piped to Where-Object and TimeCreated can be filtered by comparing to a <DateTime> just like using the -Filter parameter of other Get-… cmdlets.

After posting about this on PowerShell Forums, I found out I misunderstood the use of StartTime and EndTime in a -FilterHashtable used with Get-WinEvent. The post is, Hashtable comparison operator, less than, greater than, etc?.

Turns out whatever <DateTime> StartTime is set to in a hashtable filters for events that occurred on or after the time it is set to. And EndTime, in a hashtable, filters for events that occurred at or before the <DateTime> it has been set to!

As an example, I extract events from the Application log that occurred 24 hours ago or less. This is run on a test system that doesn’t get used often so there’s not many events in that time span.

The first example does not use the StartTime key in the hashtable. It pipes Get-WinEvent to a Where-Object and filters for TimeCreated being on or after one day ago.

The second example includes the StartTime key in the hashtable and sets it to one day ago.

Both return the same results, but there is no comparison operator used for the StartTime key in the hashtable. The hash table’s assigned StartTime value is used internally by Get-WinEvent to compare each event’s TimeCreated against the assigned StartTime value and check that it is on or after StartTime. Similarly, when EndTime is assigned a value, each event’s TimeCreated is evaluated if it is on or before the assigned value. I really feel that could have been made much clearer in the Get-WinEvent documentation.

Below, the hashtable does not include StartTime or EndTime. Where-Object filters against TimeCreated.

$FilterHashtable = @{ LogName = 'Application'
   ID = 301, 302, 304, 308, 101, 103, 108 
}
Get-WinEvent -FilterHashtable $FilterHashtable | 
   Where-Object { $_.TimeCreated -ge (Get-Date).Date.AddDays(-1) } | 
   Format-Table -AutoSize -Wrap TimeCreated, Id, TaskDisplayName

TimeCreated          Id TaskDisplayName
-----------          -- ---------------
3/1/2022 5:54:54 PM 302 Logging/Recovery
3/1/2022 5:54:54 PM 301 Logging/Recovery
3/1/2022 5:39:01 PM 302 Logging/Recovery
3/1/2022 5:39:01 PM 301 Logging/Recovery
3/1/2022 5:34:59 PM 103 General
3/1/2022 5:34:39 PM 103 General
Below, the hashtable includes StartTime. No Where-Object to filter on TimeCreated.

$FilterHashtable = @{ LogName = 'Application'
   ID = 301, 302, 304, 308, 101, 103, 108
   StartTime = (Get-Date).Date.AddDays(-1) 
}
Get-WinEvent -FilterHashtable $FilterHashtable | 
   Format-Table -AutoSize -Wrap TimeCreated, Id, TaskDisplayName

TimeCreated          Id TaskDisplayName
-----------          -- ---------------
3/1/2022 5:54:54 PM 302 Logging/Recovery
3/1/2022 5:54:54 PM 301 Logging/Recovery
3/1/2022 5:39:01 PM 302 Logging/Recovery
3/1/2022 5:39:01 PM 301 Logging/Recovery
3/1/2022 5:34:59 PM 103 General
3/1/2022 5:34:39 PM 103 General

Controlling file access

Use groups to maintain ACLs.

Digital information has creators, owners, editors, publishers, and consumers. Dependent on the information it has different approved audiences; public, creator’s organization, leadership, functional group, etc. And the audiences can be subdivided dependent on the level of authority they have; read only, modify, create, etc.

How to control who sees what? Accounts need to access, change and create information. At least some of that information will be in the cloud, either your own, or space and services hosted and invoiced monthly, or a combination. Access to public and private domains should be convenient for authorized users on supported platforms.

And be sure to classify the information! The public stuff has access control set so everyone can see it. Everything else needs to be someplace private. Add in an approval process for material to go public. Devise a rights scheme for the private domain. Owners, Editors, Readers.

Add to all this a folder hierarchy that supports the envisioned rights and document access should be understandable, maintainable, and auditable (with proper auditing enabled).

What’s the *perfect* configuration for all of this? As far as I’ve discovered, there isn’t one. Please comment with any reference if you know of some.

The perfect configuration is one that is maintained per business needs. Maintained is really the operative requirement.

Default everything to private so only authors have access to their own work?

How to collaborate? Give others read/edit access as needed per instructions from owner? That gets into LOTS and LOTS of ACL changes as people change in the organization, to say nothing of sun setting access. When should those collaborators have edit removed, or what about even read?

If rights are granted by individual account then this creates lots of future unidentified GUIDs in ACLs as accounts are removed, or lots of maintenance to find the accounts in the ACLs and remove them before the account is removed.

And, even if accounts aren’t removed because the person is changing position so should have access to different files, if requires lots of maintenance as people move from position to position.

Default everything to public read only and authors have edit access to their own work?

This limits the need to provide access to individual accounts unless the account needs edit rights to a document. If the same approach is taken to granting edit rights as was suggested for read rights above, then the same situation with maintaining access occurs except this time only for editors. Likely a lesser support burden but nonetheless still one that is likely to leave orphaned GUIDs in the ACLs.

Manage access by group!

Create Reader and Editor groups. As many as needed to accommodate each of the various groups needing access to the folders and files. Add and remove accounts from the groups as needed.

Managing access by group won’t cover all the needs. It may still be necessary to put individual accounts into the ACLs. However managing by group will limit the need to put individual accounts into the ACLs, and it will help make clear the rights if group name conventions are used to make the purpose of the group more apparent, e.g., AccountsPayableReaders, AccountsPayableEditors.

This can be taken further. If the two groups above have relatively steady membership then accounts that have limited need to access as readers or editors can be added to groups within these groups making it apparent the account holder has temporary access. The nested groups could be TmpAccountsPayableReaders, and TmpAccountsPayableEditors.

In the end..

There is not a “perfect” no maintenance system to manage and control access rights. Groups are certainly recommended over individual accounts. So long as the organization experiences changes that should affect document access it will be necessary to maintain ACLs.

The goal really is to limit the work needed to know what access is granted to which accounts, to maintain proper access, and use a method that is sustainable.

Groups really are the solution. Groups and a well established process to identify, classify, and assign rights to information throughout its lifecycle from creation to retirement.

Diving into Tiered Administration

Really? There’s always something wrong in the instructions :-/

Approaches to improving security are always interesting to me. Recently I became aware of tiered administration as an aside in a security video I watched. “10 Work From Home Security Settings You Can Implement Now to Block Attackers.” Very good. Watch if you can. The intro to tiering admin credentials and systems begins at about 30:10. That started the dive for me!

There are many background and architectural articles on Microsoft.com. They talk ideas and generalization with really bad confusing graphics (imho). However, I found one article that promised to step through the process of setting up Tiered Administration, Initially Isolate Tier 0 Assets with Group Policy to Start Administrative Tiering – Microsoft Tech Community.

I followed the steps and it didn’t result in Domain Admins members being prevented logon to a member server or workstation. I repeated the process several times to be certain I hadn’t overlooked something and got the same lack of result each time.

The Group Policy precedence in the article didn’t work. The precedence in a comment to the article that stated the precedence in the article was wrong, also didn’t work.

At that point I put together a chart to track the hosts, accounts, policies, and security groups I was using. With the chart, and patiently changing one attribute at a time and repeating logon tests, I finally found a combination that worked!!

Great, Tier0 accounts couldn’t logon to anything except Tier0 assets. Now start trying other things in my virtual environment to find out what needs to be accounted for if migrating a domain to the restricted accounts model.

It didn’t take long to find there’s also something else Tier0 Domain Admins accounts couldn’t do, they couldn’t install software on Tier1 & 2 assets any longer. The Tier0 accounts couldn’t logon and there were no dedicated Tier1 or 2 accounts to use. (Should have tried the app server’s local admin for logon. Then try s/w install and see if could use Tier0 credential to perform s/w install.) Members of Local Administrators group can install software. Domain Admins group is in the local Administrators group. So any member of Domain Admins should be able to install software.

If a Tier0 account is in the group that limits logon on to only Tier0 assets then it cannot logon and install software on Tier1 & 2 assets. So, have Tier0 accounts restricted to Tier0 assets but how are Tier1 and 2 assets going to be managed?

Nowhere in the article is this limitation mentioned! Set up Tier0 admins and suddenly Tier1 & 2 assets can’t be managed with any Domain Admin group account. A real problem.

Back to my trusty charts. Create new security groups and Group Policies after spending some time trying to understand the policies and how they’re being applied. Then start testing.

Seems my head scratching after discovering the problem and before trying to produce a solution worked. I came up with a scheme that doesn’t change the working Tier0 accounts and hosts settings and gives Tier1 accounts access to Tier1 assets but not Tier0 assets. Still a bit more testing to confirm Tier1 can’t access Tier2. Then testing to confirm able to create Tier2 accounts. Then check the effect on service accounts which currently are admin accounts used only for function of certain software, e.g. manage audit settings to capture and report changes in the environment.

Anyhow this screed was about two things really. My satisfaction standing up a Tiered Admin environment (at least the beginnings, in test) and my growing frustration over technology implementation articles written as step-wise instruction that just don’t work (Tiered Admin, Certificate Services, Federation Services to name a few), and that leave out really important information like, “if you do this, you loose admin access to Tier1 & 2 assets.”

The “how to articles” that don’t actually work are all from Microsoft.com URLs. A third party site getting it wrong, frustrating but not feeling misinformed by an authority I should be able to trust. After all, not Microsoft. An article on Microsoft.com that says “do this” get “that result” that’s wrong or incomplete, very frustrating! If you can’t trust Microsoft about how to use its software then who are you going to trust?

Windows 10 images

Windows’ various versions are the computer operating system I’ve supported my entire professional career. There have been very occasional instances of supporting other systems like Mac’s OS, both before and after Apple switched their OS to UNIX.

There’s many things I don’t like about Windows. I’ve stopped using it for my personal systems for around a decade now. One of many gripes is the installation and update process.

For a while I was fortunate enough to have a professional staff who developed Windows deployment images for our company. They were very good and made image deployment “just work”. It was to the point that about all that was necessary was network boot the pc, point it to the image source and sit back and wait.

I reviewed the procedures they created. Asked questions to better understand what needed to be done to create the Windows images. I never actually was hands on creating an image though. Not from my staff’s documentation and not with any of them shoulder surfing me through the process.

Years later I reached the point of needing to create zero touch deployment images on my own. I failed. It seemed I was close to the solution but never quite there.

Microsoft’s documentation is terribly frustrating for me for the task of image creation. I’ve not found a single Microsoft webpage that goes from zero to bootable deployment image. There’s lots and lots of webpages with instructions for various portions of the work. And some webpages with basic outlines that have links (too many) to details that themselves have many links to more details. Alice never went down such a deep rabbit hole.

Then I found Kari Finn`s guide to “Create media for automated unattended install of Windows 10” on tenforums.com. Kari takes all the diversions Microsoft provides and narrows them down into a single linear process that goes from having installation media to having a zero touch custom installation image. BRAVO and thank you Kari!

Using the guide I’ve finally made my first successful zero touch deployment image!!!

From here I’ll make custom images for the software installations and architectures, BIOS/MBR and UEFI/GPT, that I need to support.

Finally I can make my own images. The world is my oyster.